When I started teaching, I favored “traditional” assessments that were similar to the ones I experienced as a student. These mostly consisted of quizzes and tests with written tasks such as, “Draw the Bohr model and Lewis dot structure for an element with an atomic number of 17.”
For many students, these quizzes and tests accurately assessed their understanding of the concepts they were learning in my chemistry class. However, I noticed that some students struggled to share their learning in written exam contexts, but were skilled at explaining concepts to their peers. Since I teach a chemistry class and not an exam skills class, the assessments were proving to be a barrier to these students’ learning.
There was one student in particular, who I’ll call “Alex.” He excelled in conversations with his peers and often shared his thoughts in class discussions, but his performance on written exams did not reflect the full depth of his understanding. I decided to design an assessment structure with Alex in mind: one that was rigorous and meaningful, but also highlighted his conversational skills.
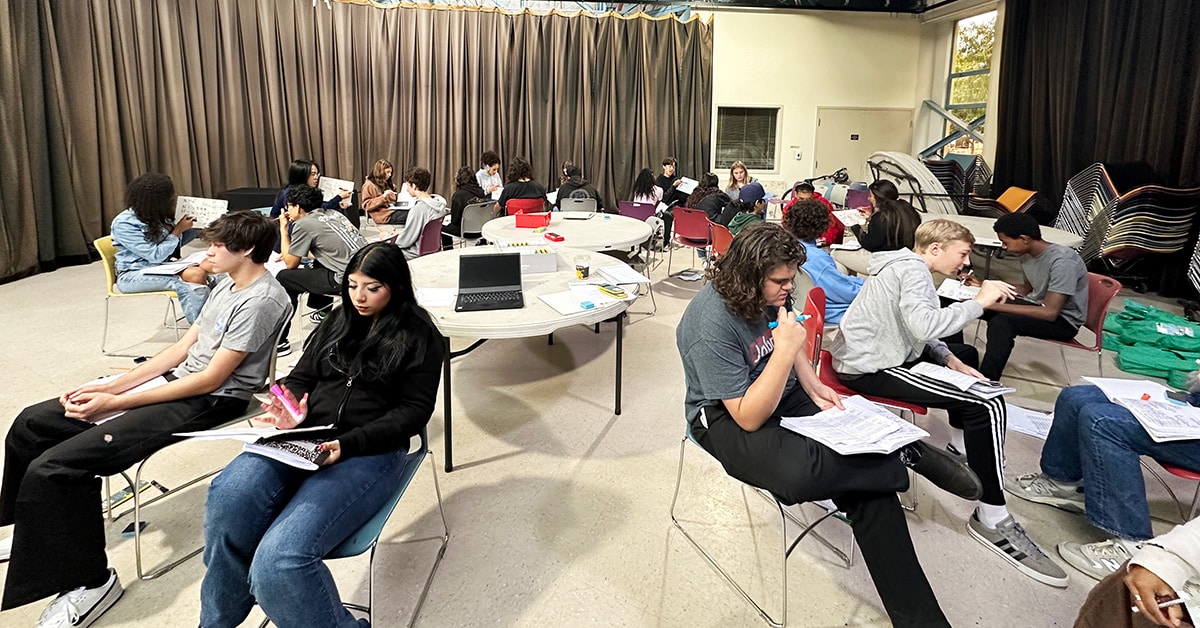
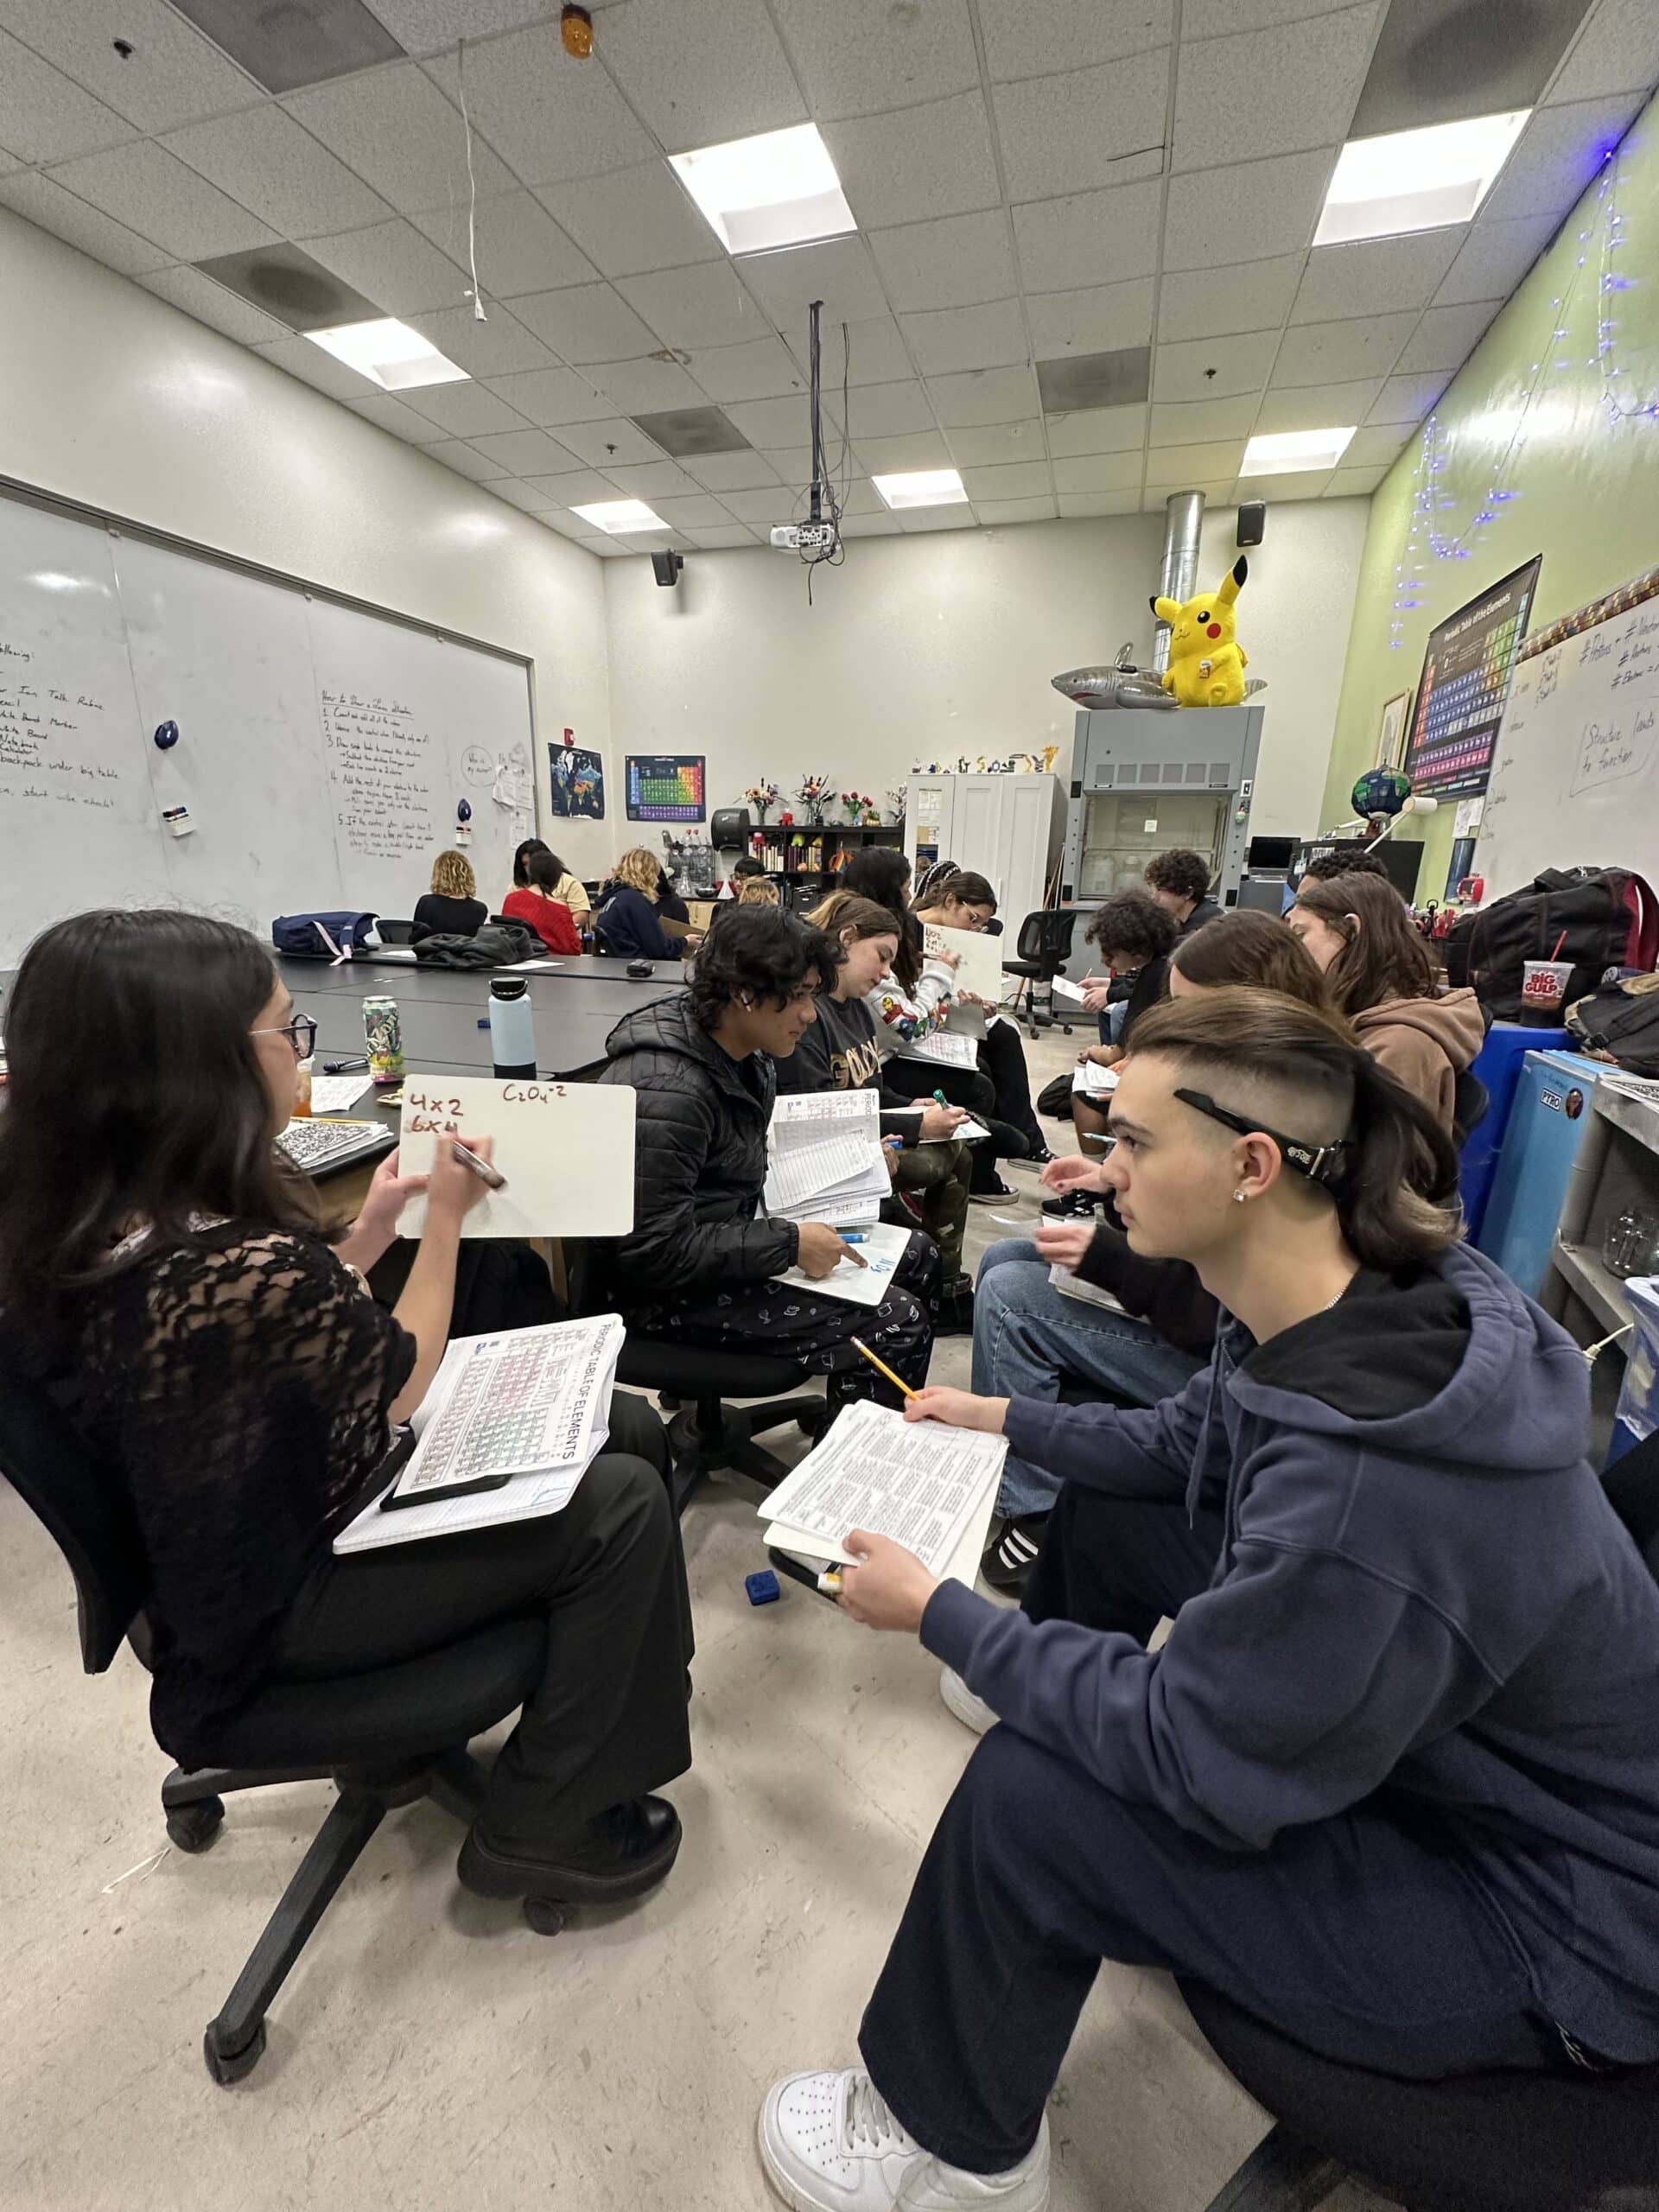
The whiteboard assessment is essentially a social event. Students sit in two concentric rings of chairs, with those in the inner ring facing students in the outer ring. The students in the outer ring have whiteboards and other resources to perform the assessment. The students in the inside ring have a pencil and a rubric with which to assess the student across from them. The teacher assigns a different question to each student on the inside ring so that those students being assessed will tackle a variety of questions as they present.
Within a designated time period (I normally do 2–3 minutes), students in the outer ring complete the question assigned to them by the student on the inner ring. As each outer ring student presents to the inside ring on their whiteboards, their peers on the inside ring underline habits of success in each area of their peers’ rubrics. They also support the student if they get stuck. As these are one-on-one presentations, students are usually less nervous to share their thoughts and better able to demonstrate their understanding and content mastery with a focus on basic presentation skills. To further remove pressure, I provide students with the list of questions ahead of time so they can practice.
I stand in the center of the circle, so I can see every student present. I take note of who needs help and encourage their peers to correct them in real time. When the timer goes off, students in the outer ring rotate so they can interact with someone new and demonstrate their knowledge on another question. The students rotate two chairs at a time, all the way around the ring.
After the outside ring finishes their rotation, students from the outer and inner rings swap and repeat the process. This gives every student a chance to assess and be assessed by their peers. In total, this assessment takes about 60 minutes.
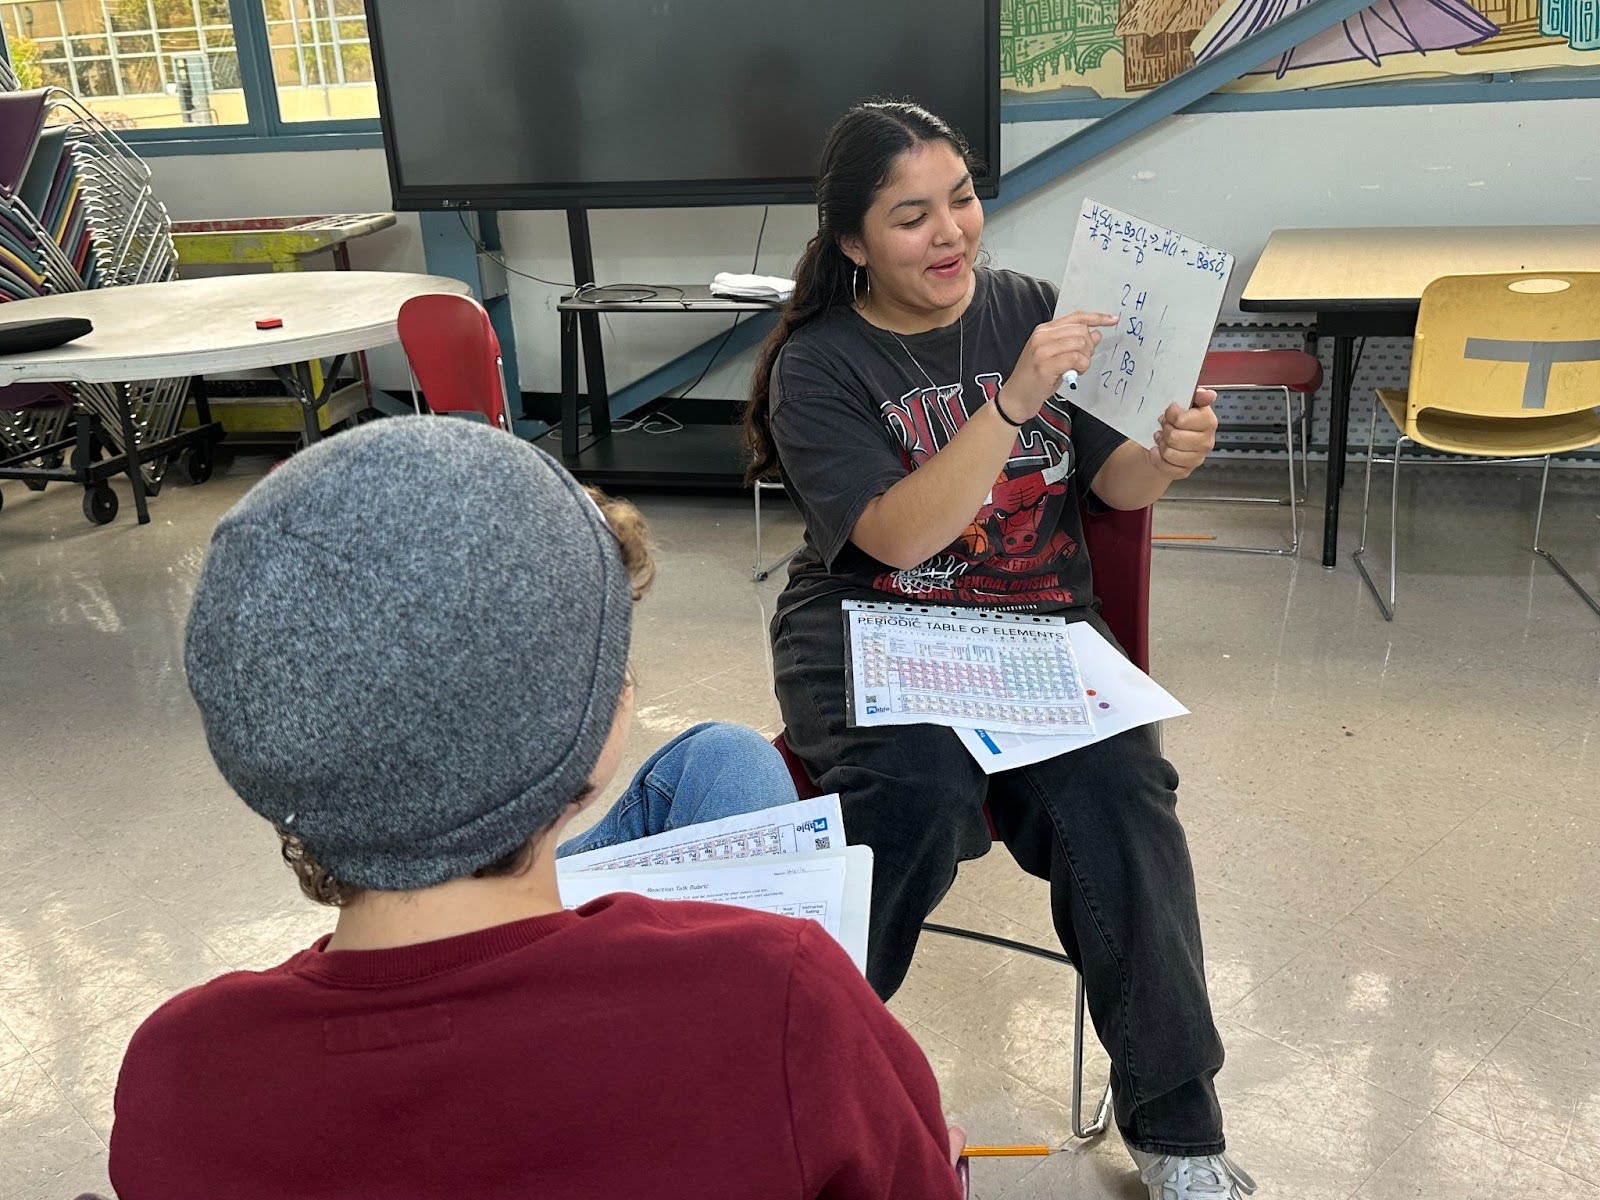
Question: Determine the reaction type, predict the products, and balance the equation for the reactants:
H2SO4 + BaCl2 →
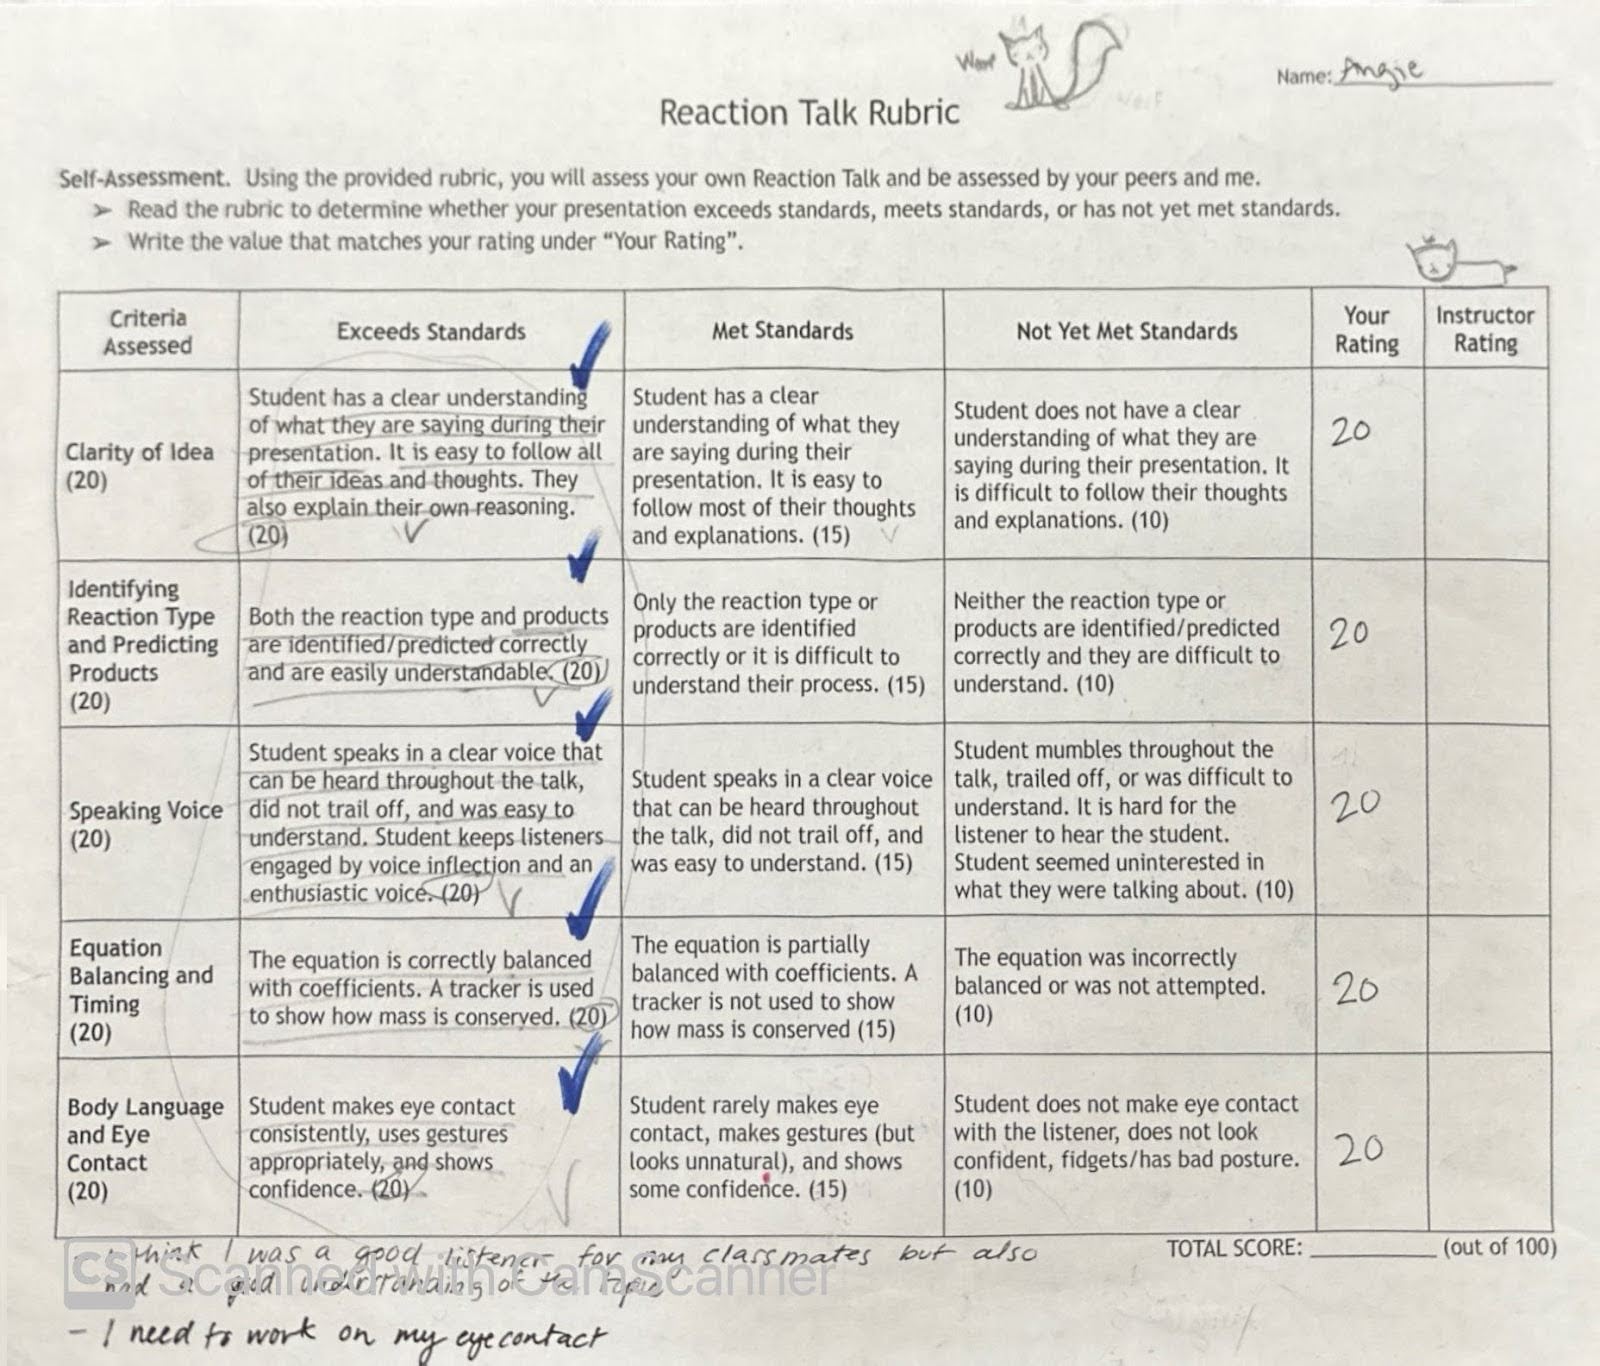
Students had three minutes to complete this question. The following photos show students filling out their whiteboard as well as the completed rubric.

Students pass this assessment by proving they can apply the concept(s) to multiple questions as they rotate around the circle. If a student can’t complete a question, I encourage their peer grader to talk them through the question.
I often have students practice on the whiteboards with each other in the days leading up to the assessment so they can support each other and understand the expectations. If a student doesn’t understand a concept well enough to explain it, this becomes evident during the practice rounds and we can deal with it before we get to the actual assessment.
Should a student be unable to do the assessment, there are a few options. One is for them to sit with me as a partner and show me where they are getting stuck. Other times—for example, if a student has been absent for a chunk of time leading up to the assessment—I will have them observe first and see if they would rather get assessed later.
Over the years, this whiteboard assessment has evolved into a core exam practice in my class. It holds students accountable to one another to support their learning, while empowering them to lean into their communication strengths. It necessitates that they understand the content to a level at which they can teach each other, a level deeper than a traditional exam offers, while at the same time seeming more approachable than other methods. It allows me to efficiently check multiple students’ level of understanding while encouraging them to interact and demonstrate their learning. While I only set out to design an assessment for Alex, I ended up creating a platform for all students to shine.