 As I read the students’ reflections on our latest project, building hovercrafts, I wondered what I could have done differently. Many students commented that they struggled with their design and working with their group. I noticed these challenges as well. I couldn’t help but compare their creativity on this project to another design project we did in the beginning of the year. In September, students were asked to “redesign the classroom” to make it more functional and flexible. When I compare these two projects, I realize there was one big difference about our process. When students redesigned the classroom we used Stanford d.school’s Design Thinking process to guide our work. We did not use this during the hovercraft project. I wondered how using this process might have affected student’s levels of creativity so I sat down with one of my students, Ethan, to get a student’s point of view. Through our conversation, it became clear that he felt the structure of the Design Thinking process helped his group become more creative and cohesive.
According to the d.school web site, Design Thinking is a process for producing creative solutions to nearly every challenge. Students learn by doing, with a bias toward action in the real-world:
We don’t just ask our students to solve a problem, we ask them to define what the problem is. Students start in the field, where they develop empathy for people they design for, uncovering real human needs they want to address. They then iterate to develop an unexpected range of possible solutions, and create rough prototypes to take back out into the field and test with real people. (2012)
This process has become popular in the business and education community because of its focus on innovation, a skill highly valued in the 21st century marketplace. The structures built into each phase allow for high levels of creativity and collaboration, therefore, leading to innovative outcomes.

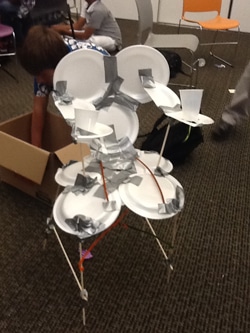
During the redesign the classroom project, specific structures were set up for small groups to collaborate. Our teaching team decided when and how students would brainstorm, prototype, and test with the user as I will describe in more detail below. We would eventually build some of the ideas generated, but the focus of this project was to practice the skills needed for design thinking: collaboration, creative thinking, and problem solving. During the hovercraft project, however, students received instructions on how to build the actual hovercraft but had no structure for how to design the top or how to collaborate with their group. Groups had the freedom to design and build in whatever fashion they saw fit. The focus was now on learning physics and craftsmanship skills. I watched as all groups immediately got to work building. They spent very little time formally planning their design and most discussions happened while multitasking. It was rare to see a whole group of four together for more than a few minutes. In our conversation, Ethan reflected on the experience saying that his group had trouble collaborating. They each had separate ideas for the hovercraft design and had to compromise on the final product. He felt that this made the end result less creative than the various original ideas. Some teachers might think that the huge amount of freedom would allow creativity to flourish but it actually did the opposite. Students exhibited their hovercrafts in a “Freedom Fighters” parade for multiple schools to view. Although the learning goals of this project were more focused on science, the real-world audience created the need for a beautiful final product. Many students did not consider the final designs to be their most creative, best work.
In Out of Our Minds, Ken Robinson, defines creativity as, “the process of developing original ideas that have value” (2011, p 2). He believes that everyone has creative capacities but not everyone develops those capacities. In her book, inGenius (2012), Tina Seelig agrees and argues that the skill of creativity can and should be taught. It is not a fixed ability that people either have or don’t have. She also claims that creativity is better taught with a set of formal tools or processes, which may seem counterintuitive to some but actually enhances creativity. Thinking about the importance of formally teaching creativity made me reflect back on our redesign the classroom project. What exact tools and processes helped students reach a higher level of creativity? How did the design thinking process allow us to meet each student where they were creatively but ultimately push them to reach higher levels of creativity? In each phase of the process, how can I use the Design Thinking process to scaffold creativity?
First, I can give students a starting point. The first step in the design process, empathy, was an important scaffold because it gave students a specific user or a starting point in which to design for. As two students, Megan and Nayeli told me later, they actually feel more creative when they have a starting point. Too much freedom and no constraints makes it harder for them to think creatively when it comes to design. During the redesign the classroom challenge students chose one specific user to interview. By asking many questions and then synthesizing all of the information gathered, groups were able to identify their user’s specific need or problem when it came to working in a classroom. Some users needed a quiet place to work while others needed music. One student wanted to bring nature into the classroom. Others needed places to put their various supplies. By now designing for the one person they interviewed, students had a narrow, more manageable focus for the rest of the design process.
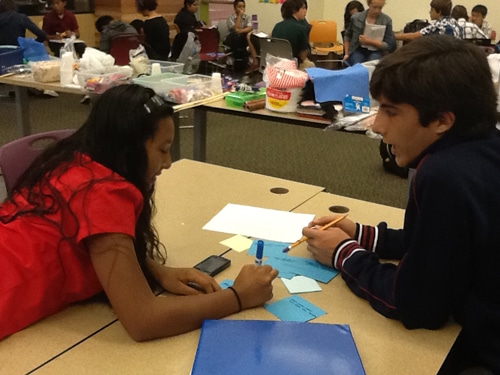
Clarifying the user’s need also gave a starting point for the next stage, ideating. Ideating, or brainstorming, is a structured way to record the numerous ideas for meeting the user’s needs. There are two ways to push student’s creative thinking during this stage. The first is to model a technique called “yes, and.” Instead of all four members of a team listing out their own ideas only, students are also encouraged to build off of other’s ideas by saying “yes, and…” For example, one member might suggest a chair that has pocket to store supplies. Another member might say, “Yes, and the chair has an ipod dock.” Third member: “Yes, and the chair can be raised to the roof so the student can have privacy.” In this way, members work together to build a collaborative list of ideas and all students feel attached to the list. They are not competing for ownership of the best idea. A second way to push creativity during ideation is to periodically call out additional parameters for the ideas such as: what if you had a million dollars, what if you had no money, what if your invention was made in the future, what if it was made for aliens. These suggestions push students past the practical solutions to more innovative ideas. During this step of the process, Ethan remembers his group members building off of each other’s ideas to make an even more innovative list than they would have working alone. This “group-think” style made for a longer, and more creative final list of ideas. He felt that this step was also important for building group buy-in for all members. Members had created the list together and were therefore invested in all ideas.
 Prototype and Test
Once a group had chosen their favorite ideas, they moved on to the prototyping stage. Students rapidly built example models with various cheap supplies such as paper clips, post it notes, buttons, and tape. Prototyping should be fast and crude for the sole purpose of showing an idea to the user in order to solicit feedback. After testing with the user, groups should make revisions and repeat the process until they have a final design that meets the users original need. This prototype, test, revise cycle leads to creative problem solving in two ways. One, students have to find a way to represent their often wild idea with common supplies such as those mentioned above. Second, they have to respond to the feedback given by the user to adapt their product. Students may feel compelled to stick to their ideas no matter what. In the Design Thinking process, however, you are responding to someone else’s need and are designing for them, not yourself. This helps to separate the designer from the product so that they are not emotionally attached and may result in a more creative end product.
When Ethan’s group prototyped for the redesign the classroom project, they designed a table with a privacy shield made of Velcro that also holds personal supplies. He expressed pride in his group’s product and felt that it was very creative. When talking about his group’s hovercraft design, on the other hand, he felt that his group did not reach their creative potential. Ethan’s group did experience many opportunities to creatively problem solve as they built and tested their hovercraft or when elements of their design failed. Ethan was unhappy with the final look of the hovercraft though, and believes that if they would have prototyped first, that would have led to more group buy-in and a more creative final design.
The basic Design Thinking process, and the strategies within each step, are all ways to scaffold the skill of creative thinking. Some students may not need these structures and are able to create amazingly innovative products within complete freedom. That student is rare, however. Teaching through projects has allowed me to see that most students actually need structures to allow their personal and collaborative creativity to come out.
Listening to Ethan’s assessment of the two projects made me wonder why students hadn’t used elements of the Design Thinking process on their own. I asked him if he would use parts of the process on his own during a project. Couldn’t he suggest a brainstorm session or rapid prototyping to his group? He agreed that he could suggest it but thought that a group of four might not agree to do it. He thought a partnership of two would work better. As we talked about the transfer of responsibility from teacher as facilitator to student as leader, I could see that this was the next step in scaffolding creativity. The design thinking process had been carefully structured in the first challenge but now I needed to help students internalize the steps and implement them independently. I can help them make the transfer by reminding them of the steps involved before starting a project but also allow the group to have autonomy in implementing those steps.
Just as in scaffolding math or language acquisition, teachers should provide structures and supports when needed in order to support all learners. We also need to build independence by gradually removing this scaffold. Creative thinking skills are no different. The Design Thinking Process is just one way to meet students where they are creatively and build their skills from there.
Stanford Universtiy. Innovators, not innovations. (December 5, 2012). Retrieved from dschool.stanford.edu/our-point-of-view/#innovators
Robinson, K. (2011). Out of our minds: Learning to be creative (2nd). West Sussex, U. K.: Capstone Publishing Ltd.
Seelig, T. (2012). inGenius: A crash course on creativity. New York, NY: HarperCollins Publishers.
As I read the students’ reflections on our latest project, building hovercrafts, I wondered what I could have done differently. Many students commented that they struggled with their design and working with their group. I noticed these challenges as well. I couldn’t help but compare their creativity on this project to another design project we did in the beginning of the year. In September, students were asked to “redesign the classroom” to make it more functional and flexible. When I compare these two projects, I realize there was one big difference about our process. When students redesigned the classroom we used Stanford d.school’s Design Thinking process to guide our work. We did not use this during the hovercraft project. I wondered how using this process might have affected student’s levels of creativity so I sat down with one of my students, Ethan, to get a student’s point of view. Through our conversation, it became clear that he felt the structure of the Design Thinking process helped his group become more creative and cohesive.
According to the d.school web site, Design Thinking is a process for producing creative solutions to nearly every challenge. Students learn by doing, with a bias toward action in the real-world:
We don’t just ask our students to solve a problem, we ask them to define what the problem is. Students start in the field, where they develop empathy for people they design for, uncovering real human needs they want to address. They then iterate to develop an unexpected range of possible solutions, and create rough prototypes to take back out into the field and test with real people. (2012)
This process has become popular in the business and education community because of its focus on innovation, a skill highly valued in the 21st century marketplace. The structures built into each phase allow for high levels of creativity and collaboration, therefore, leading to innovative outcomes.
During the redesign the classroom project, specific structures were set up for small groups to collaborate. Our teaching team decided when and how students would brainstorm, prototype, and test with the user as I will describe in more detail below. We would eventually build some of the ideas generated, but the focus of this project was to practice the skills needed for design thinking: collaboration, creative thinking, and problem solving. During the hovercraft project, however, students received instructions on how to build the actual hovercraft but had no structure for how to design the top or how to collaborate with their group. Groups had the freedom to design and build in whatever fashion they saw fit. The focus was now on learning physics and craftsmanship skills. I watched as all groups immediately got to work building. They spent very little time formally planning their design and most discussions happened while multitasking. It was rare to see a whole group of four together for more than a few minutes. In our conversation, Ethan reflected on the experience saying that his group had trouble collaborating. They each had separate ideas for the hovercraft design and had to compromise on the final product. He felt that this made the end result less creative than the various original ideas. Some teachers might think that the huge amount of freedom would allow creativity to flourish but it actually did the opposite. Students exhibited their hovercrafts in a “Freedom Fighters” parade for multiple schools to view. Although the learning goals of this project were more focused on science, the real-world audience created the need for a beautiful final product. Many students did not consider the final designs to be their most creative, best work.
In Out of Our Minds, Ken Robinson, defines creativity as, “the process of developing original ideas that have value” (2011, p 2). He believes that everyone has creative capacities but not everyone develops those capacities. In her book, inGenius (2012), Tina Seelig agrees and argues that the skill of creativity can and should be taught. It is not a fixed ability that people either have or don’t have. She also claims that creativity is better taught with a set of formal tools or processes, which may seem counterintuitive to some but actually enhances creativity. Thinking about the importance of formally teaching creativity made me reflect back on our redesign the classroom project. What exact tools and processes helped students reach a higher level of creativity? How did the design thinking process allow us to meet each student where they were creatively but ultimately push them to reach higher levels of creativity? In each phase of the process, how can I use the Design Thinking process to scaffold creativity?
First, I can give students a starting point. The first step in the design process, empathy, was an important scaffold because it gave students a specific user or a starting point in which to design for. As two students, Megan and Nayeli told me later, they actually feel more creative when they have a starting point. Too much freedom and no constraints makes it harder for them to think creatively when it comes to design. During the redesign the classroom challenge students chose one specific user to interview. By asking many questions and then synthesizing all of the information gathered, groups were able to identify their user’s specific need or problem when it came to working in a classroom. Some users needed a quiet place to work while others needed music. One student wanted to bring nature into the classroom. Others needed places to put their various supplies. By now designing for the one person they interviewed, students had a narrow, more manageable focus for the rest of the design process.
Clarifying the user’s need also gave a starting point for the next stage, ideating. Ideating, or brainstorming, is a structured way to record the numerous ideas for meeting the user’s needs. There are two ways to push student’s creative thinking during this stage. The first is to model a technique called “yes, and.” Instead of all four members of a team listing out their own ideas only, students are also encouraged to build off of other’s ideas by saying “yes, and…” For example, one member might suggest a chair that has pocket to store supplies. Another member might say, “Yes, and the chair has an ipod dock.” Third member: “Yes, and the chair can be raised to the roof so the student can have privacy.” In this way, members work together to build a collaborative list of ideas and all students feel attached to the list. They are not competing for ownership of the best idea. A second way to push creativity during ideation is to periodically call out additional parameters for the ideas such as: what if you had a million dollars, what if you had no money, what if your invention was made in the future, what if it was made for aliens. These suggestions push students past the practical solutions to more innovative ideas. During this step of the process, Ethan remembers his group members building off of each other’s ideas to make an even more innovative list than they would have working alone. This “group-think” style made for a longer, and more creative final list of ideas. He felt that this step was also important for building group buy-in for all members. Members had created the list together and were therefore invested in all ideas.
Prototype and TestOnce a group had chosen their favorite ideas, they moved on to the prototyping stage. Students rapidly built example models with various cheap supplies such as paper clips, post it notes, buttons, and tape. Prototyping should be fast and crude for the sole purpose of showing an idea to the user in order to solicit feedback. After testing with the user, groups should make revisions and repeat the process until they have a final design that meets the users original need. This prototype, test, revise cycle leads to creative problem solving in two ways. One, students have to find a way to represent their often wild idea with common supplies such as those mentioned above. Second, they have to respond to the feedback given by the user to adapt their product. Students may feel compelled to stick to their ideas no matter what. In the Design Thinking process, however, you are responding to someone else’s need and are designing for them, not yourself. This helps to separate the designer from the product so that they are not emotionally attached and may result in a more creative end product.
When Ethan’s group prototyped for the redesign the classroom project, they designed a table with a privacy shield made of Velcro that also holds personal supplies. He expressed pride in his group’s product and felt that it was very creative. When talking about his group’s hovercraft design, on the other hand, he felt that his group did not reach their creative potential. Ethan’s group did experience many opportunities to creatively problem solve as they built and tested their hovercraft or when elements of their design failed. Ethan was unhappy with the final look of the hovercraft though, and believes that if they would have prototyped first, that would have led to more group buy-in and a more creative final design.
The basic Design Thinking process, and the strategies within each step, are all ways to scaffold the skill of creative thinking. Some students may not need these structures and are able to create amazingly innovative products within complete freedom. That student is rare, however. Teaching through projects has allowed me to see that most students actually need structures to allow their personal and collaborative creativity to come out.
Listening to Ethan’s assessment of the two projects made me wonder why students hadn’t used elements of the Design Thinking process on their own. I asked him if he would use parts of the process on his own during a project. Couldn’t he suggest a brainstorm session or rapid prototyping to his group? He agreed that he could suggest it but thought that a group of four might not agree to do it. He thought a partnership of two would work better. As we talked about the transfer of responsibility from teacher as facilitator to student as leader, I could see that this was the next step in scaffolding creativity. The design thinking process had been carefully structured in the first challenge but now I needed to help students internalize the steps and implement them independently. I can help them make the transfer by reminding them of the steps involved before starting a project but also allow the group to have autonomy in implementing those steps.
Just as in scaffolding math or language acquisition, teachers should provide structures and supports when needed in order to support all learners. We also need to build independence by gradually removing this scaffold. Creative thinking skills are no different. The Design Thinking Process is just one way to meet students where they are creatively and build their skills from there.
Stanford Universtiy. Innovators, not innovations. (December 5, 2012). Retrieved from dschool.stanford.edu/our-point-of-view/#innovators
Robinson, K. (2011). Out of our minds: Learning to be creative (2nd). West Sussex, U. K.: Capstone Publishing Ltd.
Seelig, T. (2012). inGenius: A crash course on creativity. New York, NY: HarperCollins Publishers.